Installing nginx and PHP7.2 on Ubuntu 18.04

Before you’re going mad about this unintelligible so-called tutorial, let me clarify that this post is not a fairy story about a successful installation. Instead, it falls into my favorite WordPress category : fail:reconstructed.

Ubuntu 18.04

By the time of writing, I had never successfully installed Ubuntu 18.04 from fresh, daily-build .iso you usually get from Ubuntu official page. Meanwhile, this post is written on a Firefox browser, running on Ubuntu 18.04 inside a box of Oracle’s VirtualBox. How did I get here?

My first trial on installing Bionic Beaver was by downloading the daily build iso and shoving it into a VM box. It was installed successfully, allowed me to see the first sight of its GNOME theme and the removal of app menu in Firefox. The problem is I can never get past the boot screen next time I restart the VM (that SO post isn’t mine tho, but glad to see I’m not the only one).

My second trial was downloading more recent iso (differs by 1 day from my first trial). The problem persisted.

My third trial was installing a fresh 16.04, apt update && apt upgrade it to the latest package, then Alt+F2 and launch the update-manager -d to check whether there’s an available option to upgrade to 18.04. And there it was :

My previous configuration used kambing repository for speed reason. Alas, it failed to provide some files necessary to run the upgrade process :

Changing repository to us.archive.ubuntu.com solves the problem. The upgrade process ran smoothly and here I am writing this post on a restart-able Bionic Beaver.

Nginx

Ubuntu 18.04 Bionic Beaver ships with default nginx package version 1.13.x .

Use -s option to simulate an installation of packages

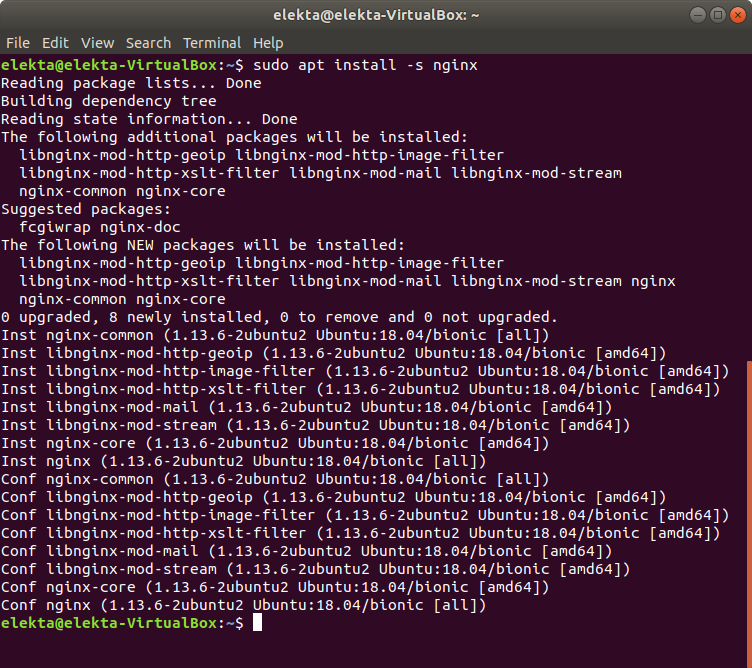
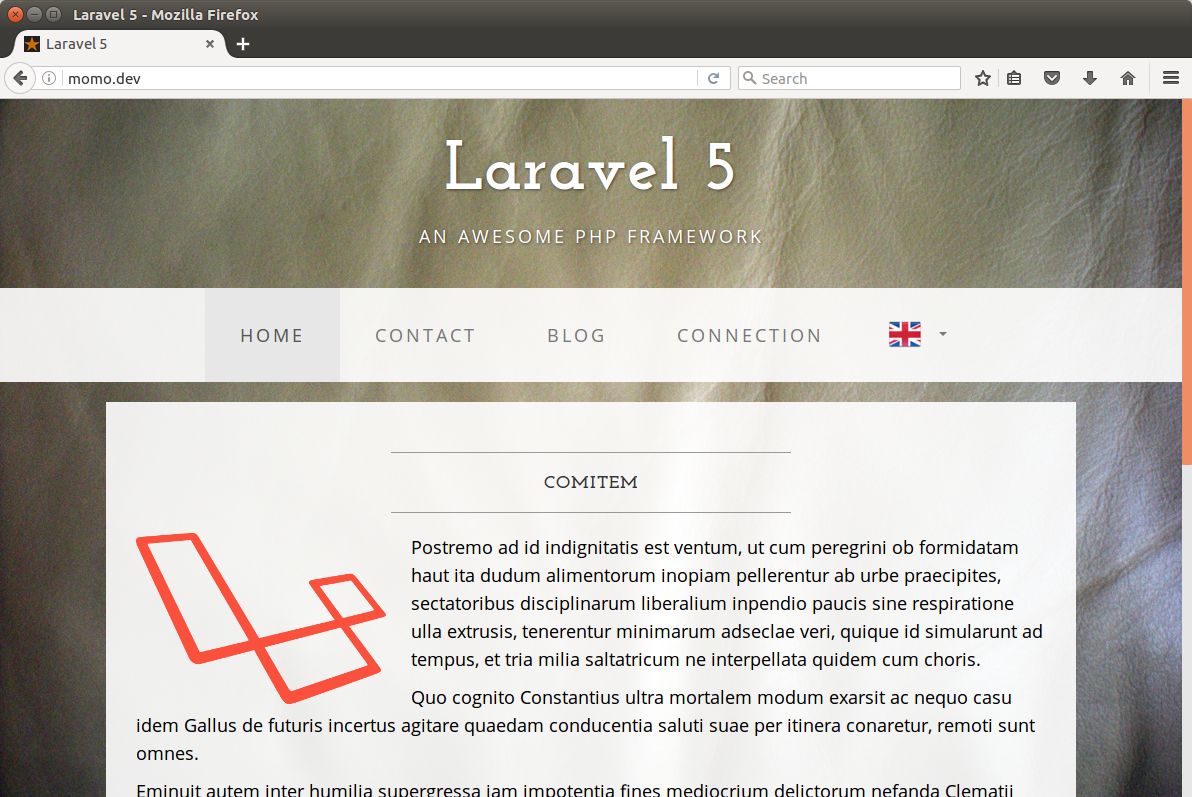
Done installing nginx, let’s take a look at our localhost to check whether nginx has been installed properly. If everything works fine and the nginx server has started, you should see an unmistakably similar page like the capture below.

PHP 7.2

We can install PHP7.2 directly from Ubuntu repository, without the need of adding Ondrej’s PPA.

Simulating installation of php7.2 package

Here comes the trick. If you want to deploy your PHP code and give nginx the right to handle PHP files, do not apt install php7.2

This is what gonna happen if we persist in installing php7.2 package. As you can see in the simulation above, it will install apache2 packages as well. Since we intend to use nginx as our web server, these apache2 packages will never be used, and instead will interfere with our previous nginx configurations. First, you will see that localhost page now shows apache2 welcome page :

“Oh, no worries, let’s just shut down the apache service and start the nginx” – maybe that’s what comes into our mind. Actually, at this moment the apache service is not even started, and the Apache2 Ubuntu Default Page shown above is actually an HTML file (/var/www/html/index.html) served by nginx service (which is still running).

TL;DR

If you just want to have nginx as your web server to serve PHP files from your web root, only install php-fpm package (php7.2-fpm and its required packages). It will serves you right out of the box, without hassling over apache-nginx conflict, and of course it has a smaller footprint.


Posted in fail : reconstructed | Leave a comment

Mencari Peraturan

Jadi beberapa bulan lalu tercetus sebuah ide untuk bikin sistem yang membutuhkan kumpulan produk hukum di Indonesia sebagai bahan mentah. Baru Senin kemarin rancangan awalnya jadi dan hari ini iseng-iseng nyari sistem yang sudah ada dan relevan, baik yang dimiliki oleh pemerintah ataupun bukan.

Mulai dari website resmi Kementerian Hukum dan HAM tentunya merupakan ide yang tak terelakkan.

Singkat cerita sampailah saya ke website tersebut dan nampak jelas di menu utama ada menu “Produk Hukum” yang memiliki sub-menu berbagai jenis produk hukum. Akhir-akhir ini sedang ramai dibicarakan tentang Peraturan Menteri Perhubungan no 32, maka saya coba klik sub-menu Peraturan Menteri yang membawa saya pada website peraturan.go.id khusus tampilan Peraturan Menteri.

Tanpa pikir panjang saya klik pada hasil teratas : Peraturan Menteri Perhubungan Nomor 156 TAHUN 2016 Tahun 2017. (mungkin maksudnya ini peraturan tahun 2016, tapi dimasukkan ke sistem di tahun 2017)

Klik, langsung terbuka di tab baru di jendela yang sama, dan isinya adalah sebagai berikut

Dejavu. Ok saya kena troll. Mungkin harus pakai cara lain buat lihat isi peraturan tersebut. Melihat lebih teliti, di bawah judul ada tautan untuk melihat isi dalam format PDF, atau untuk mengunduh berkas. Saya coba klik tautan untuk melihat isi langsung di peramban.

Sistem yang sedang saya rancang ini memerlukan informasi tentang keterkaitan antara sebuah produk hukum dengan produk hukum lainnya. Sebagai contoh pada produk hukum yang barusan dibuka ini, ada rujukan ke produk hukum lainnya yaitu Undang-Undang Nomor 23 Tahun 2003 tentang Ketenagakerjaan. Maka saya carilah Undang-Undang tersebut.

Fitur penyaringan di peraturan.go.id nampaknya sudah cukup mumpuni. Elok kiranya kita manfaatkan.

Scroll sedikit dan ditemukanlah produk hukum yang dicari, namun ada sedikit kejanggalan…

Dalam hasil pencarian ini disebutkan bahwa Undang-Undang nomor 23 tahun 2003 adalah tentang Pemilihan Umum Presiden dan Wakil Presiden. Hmm ya ya mungkin mereka menganggap Presiden dan Wakil Presiden adalah Tenaga Kerja hmm. Tapi ada baiknya kita cek ulang mungkin saya salah.

Merujuk kembali pada Peraturan Menteri Perhubungan nomor 156, referensi ke Undang-Undang Nomor 23 Tahun 2003 diperinci dengan keterangan

Lembaran Negara Republik Indonesia Tahun 2003 Nomor 39

Sementara pada keterangan hasil pencarian tertera bahwa Undang-Undang tersebut adalah Lembaran Negara: 93. Apakah ini kesalahan pengetikan? 39 menjadi 93? atau 93 menjadi 39?

Berangkat dengan keyakinan bahwa keterangan yang benar adalah 39, saya cari di hasil pencarian seluruh Undang-Undang yang dikeluarkan tahun 2003, Undang-Undang yang merupakan Lembaran Negara nomor 39.

Dari sini dapat disimpulkan bahwa kesalahan penulisan ternyata terdapat pada PDF Peraturan Menteri Perhubungan Nomor 156 Tahun 2016, dimana Undang-Undang Nomor 13 tertulis sebagai 23. Padahal ini sudah didapatkan dari website resmi pemerintah. Yah namanya juga manusia, tidak lepas dari salah dan silap. Mungkin ia lelah. Lelah mengetik produk hukum, melakukan konversi ke PDF, lalu mengunggahnya ke sistem. Sementara ia yang bertugas sebagai pengawas juga lelah, jadi mempercayakan sepenuhnya kepada sang pengetik.


Edit 19 Oktober 2018
Hari ini saya kembali mengunjungi website peraturan.go.id sembari melihat-lihat kalau-kalau sudah ada perbaikan terhadap website tersebut. Membuka laman http://peraturan.go.id/permen.html membawa saya pada daftar permen terbaru paling relevan. Kali ini yang ditampilkan paling atas adalah Peraturan Menteri Koperasi dan UKM Nomor 11/PER/M.KUKM/XII/2017 Tahun 2018 Tentang Pelaksanaan Kegiatan Usaha Simpan Pinjam dan Pembiayaan Syariah oleh Koperasi. Mengklik pada tautan tersebut membuka laman di tab baru.


Tampaknya tidak terlalu banyak perubahan, angka di bawah “Download” masih menunjukkan 0,00 Byte (yang berdasarkan nalar umum, berarti tidak ada file yang bisa diunduh?). Status “Tidak Diketahui” masih muncul yang mana arti dari status tersebut juga tidak mudah untuk diketahui. Namun kali ini yang menggoda saya adalah link “klik disini untuk mendaftar” di bagian kanan bawah.

Saya coba klik link tersebut, dan sebuah form pendaftaran tersaji.

Untuk sebuah form pendaftaran, menurut saya form ini sudah cukup baik : terdapat field untuk upload file identitas sebagai bentuk (upaya) verifikasi, dan ada captcha untuk mencegah spam. Namun di bagian bawah form ada beberapa hal yang patut dipertanyakan.

Yang pertama adalah tulisan “Saya Setuju” sebagai sebuah <button> yang jika diklik tidak melakukan apa-apa. Hal ini dipertegas dengan keterangan di sebelah kanannya bahwa yang bisa melakukan apa-apa bukanlah tombol “Saya Setuju” melainkan tombol “Daftar”. Jadi buat apa ada tombol ini?

Kita lihat lebih dekat lagi pada keterangan tersebut. Keterangan itu menyatakan bahwa dengan mengklik tombol “Daftar”, kita menyatakan kesetujuan kita terhadap Peraturan & Ketentuan yang telah ditentukan oleh pemilik laman. Saya penasaran apa saja Peraturan & Ketentuan yang dimaksud (dilatarbelakangi karena laman ini meminta foto kartu identitas, sehingga wajar jika pemilik website membuat pernyataan terkait penggunaan data kartu identitas tersebut di bagian T&C), maka saya klik lah tautan “Peraturan & Ketentuan” tersebut. Hal yang berikutnya muncul sangat membuat saya terkejut :

Saya kurang mengerti bahasa Latin. Untuk menyatakan saya setuju dengan peraturan & ketentuan tersebut, tampaknya saya harus meminta bantuan Google Translate…

Posted in fail : reconstructed | Leave a comment

404 Nginx Error on Laravel Routes

I followed the setup as described here. The tutorial gives you everything you need to connect nginx and hhvm on Ubuntu 16.04.

Then I installed Laravel 5.3 project example provided by Momo. Thank you so much for the excellent example. Don’t forget to set the permission for storage and bootstrap/cache.

sudo chgrp -R www-data storage bootstrap/cache
sudo chmod -R ug+rwx storage bootstrap/cache

Also, to have a prettier dummy domain, this tutorial helps you set those nginx sites as well as tells you what to edit in your host file.

So I gave my Laravel project name and domain momo.dev (because it’s cool and at the same time give ’em credits). Test it out.. and voila.

.. but everytime I click on any menu in top navigation, I got this 🙁

It happened on any link other than the ‘/’ routes. So I suspected it to be routing problem in nginx or hhvm.

The solution is simple : RTFM. Change the try_files directive, replace =404 at the end of the line with

/index.php?$query_string

It’s located at the bottom of the page, so make sure every time you read a manual, read it thoroughly.

Posted in fail : reconstructed, hhvm, nginx | Leave a comment

Just Another Codeigniter Blank Screen of Death

Update Dec 2016 : HHVM now fully supports pgsql.

Thanks to failed upgrade of Windows 8->10, I get a fresh install of Windows 10. By fresh install I mean all my installed programs were gone. OK not a big deal, so I installed Ubuntu LTS and fortunately xampp/htdocs directory was untouched (unlike /data of PostgreSQL). So I backed up my projects in htdocs and start to build an HHVM-nginx-Postgre engine on local. Never done it before.

Some nginx’s .conf settings and localhost gave me blank screen.

Ctrl+Shift+I -> Network said that it was error 500 hphp_invoke. Google it, found that I have to check /var/log/hhvm/error.log. I checked and voila! My bad, hhvm does not support pg_connect.

Posted in CodeIgniter, fail : reconstructed, hhvm | Leave a comment

Netbeans FileChangeListener Delays?

This part of POVRay-Netbeans Platform integration tutorial is a good start to learn about FileChangeListener and WeakListener. This morning I tried implementing them on my own application.

Below is a capture of my app.

filechangelistener
le wild prtscr appears


Basically my app is an “image spreader” which contains empty square(s), to which you can drag-n-drop an image from palette (top-right side) to draw that particular image inside the square (left topcomponent). The app also provides a simple image editor to edit those images on palette (center topcomponent with checkerboard background).

Relative path is used to draw the image on the spreader, so it makes sense if we edit an image on the image editor, any change on that image should be instantly updated on the spreader. Thus, a FileChangeListener is needed on the FileObject representing the image.

Imitating the code from the aforementioned tutorial, all went well and the events are fired properly. Except I have to switch our focus to another application window first before go back to my app. This delay is both OK and frustating.

Below is the capture after I saved the edited image.

filechangelistener-before
the image on the left should be updated, too


So I was looking back to the javadoc and found this passage :

When attached to a file it listens for file changes (due to saving from inside NetBeans) and for deletes and renames.

It’s exactly what I have overlooked : the change must be fired inside Netbeans. It means that after we’re done writing image to the disk (I use ImageIO.write) we have to trigger the FileEvent manually (I use FileObject.refresh()). Now the functionality works as expected.

RTFM never failed me.


Posted in netbeans platform | Leave a comment

New File Dialog for Specific Template and Target Folder

Sometimes our project structure separates files by its extension (or, to be specific, its filetype), for example folder scenes in POV-Ray project here contains .inc and .pov files only. So it makes sense if our New File action on project root folder is restricted to several predefined filetypes, and these new files will be directly created in their respective folder.

projectstructure

That’s the structure of my project, where only those .cor files will be displayed under “Corak files”, and .lay files in “Layout files”. Actually those two nodes represent two directories on disk, so it’s possible for them to contain any file but my FilterNode will only display those files with .cor and .lay extension.

The first, default approach is by using CommonProjectActions.newFileAction() and put it on project’s root node. This way, we let user to select the filetype first, then our InstantiatingIterator.instantiate() will take care about the target folder.

But my client want a more to-the-point approach : the “Corak files” node, for example, should have an action to create new Corak file, that is, those with .cor extension. A little googling brings me to TemplateWizard class, which is part of Datasystems API. It has instantiate(DataObject template, DataFolder targetFolder) method which allows us to skip the first panel of new file wizard (assuming template is not null and a valid, registered template). This way, indeed we can skip the first panel, but the Back button will always be there and makes it possible for curious user to click it, select another filetype and finally ruin our plan.

Eventually I use a hardcoded approach, in which both template and target folder are specified on InstantiatingIterator subclasses. The only information I need from the action invoked is the Project that will own the file, so I create my action to be context-sensitive to Project instance. Below is the code snippet from the Action..

public final class NewLayoutWizardAction implements ActionListener {

    private Project context;

    public NewLayoutWizardAction(Project context) {
        this.context = context;
    }

    @Override
    public void actionPerformed(ActionEvent e) {
        WizardDescriptor wiz = new WizardDescriptor(new NewLayoutWizardIterator(context));
        // {0} will be replaced by WizardDesriptor.Panel.getComponent().getName()
        wiz.setTitleFormat(new MessageFormat("{0}"));
        wiz.setTitle(Bundle.CTL_NewLayoutFile());
        if (DialogDisplayer.getDefault().notify(wiz) == WizardDescriptor.FINISH_OPTION) {
            try {
                executeInstantiated(wiz);
            } catch (IOException ex) {
                Exceptions.printStackTrace(ex);
            }

        }
    }

    /**
     * The code to execute default action for the newly created dataobject.
     */
    private void executeInstantiated(WizardDescriptor wiz) throws IOException {
        for (Object o : wiz.getInstantiatedObjects()) {
            if (o instanceof FileObject) {
                DataObject obj = DataObject.find((FileObject) o);
                // run default action (hopefully should be here)
                final Node node = obj.getNodeDelegate();
                Action _a = node.getPreferredAction();
                if (_a instanceof ContextAwareAction) {
                    _a = ((ContextAwareAction) _a).createContextAwareInstance(node.getLookup());
                }
                final Action a = _a;
                if (a != null) {
                    SwingUtilities.invokeLater(() -> {
                        a.actionPerformed(new ActionEvent(node, ActionEvent.ACTION_PERFORMED, ""));
                    });
                }
            }
        }
    }
}

The executeInstantiated is just for ethical reason, since it’s confusing if a new file is created on disk but nothing happened on GUI. So we open it.

And below is the snippet from the Iterator..

public final class NewLayoutWizardIterator implements WizardDescriptor.InstantiatingIterator<WizardDescriptor> {

    private static final String LAYOUT_TEMPLATE_PATH = "Templates/JArsi/LayTemplate.lay"; //NO18N
    private Project project;
    ...
    public NewLayoutWizardIterator(Project context) {
        this.project = context;
    }

    private List<WizardDescriptor.Panel<WizardDescriptor>> getPanels() {
        if (panels == null) {
            panels = new ArrayList<>();
            panels.add(new NewLayoutWizardPanel1(project,wizard));
            String[] steps = new String[panels.size()]; //REMOVE THAT createSteps
            ...
        }
        return panels;
    }

    @Override
    public Set<?> instantiate() throws IOException {
        //Get the new file name:
        String targetName = (String) wizard.getProperty(NewLayoutWizardPanel1.WIZARD_KEY_TARGET_NAME);

        //Specify the target directory
        FileObject laysDirFO = LayoutFileUtil.getLayoutsFolder(project, false);
        DataFolder laysDirDF = DataFolder.findFolder(laysDirFO);

        //Specify the template defined somewhere in XML layer
        FileObject template = FileUtil.getConfigFile(LAYOUT_TEMPLATE_PATH);
        DataObject dTemplate = DataObject.find(template);

        //create Map for freemarker template engine
        Map hashMap = new HashMap();
        hashMap.put("width", wizard.getProperty(NewLayoutWizardPanel1.WIDTH));
        hashMap.put("height", wizard.getProperty(NewLayoutWizardPanel1.HEIGHT));
        hashMap.put("unit", wizard.getProperty(NewLayoutWizardPanel1.UNIT));

        //Create new DataObject
        DataObject dobj = dTemplate.createFromTemplate(laysDirDF, targetName, hashMap);

        //Obtain a FileObject:
        FileObject createdFile = dobj.getPrimaryFile();

        //Create the new file:
        return Collections.singleton(createdFile);
    }

    ...    

}

NB : A less restricted approach can be achieved using PrivilegedTemplates and RecommendedTemplates as described here.

Posted in netbeans platform | Tagged , | Leave a comment

Can only redo once?

UndoRedo Visual Library
In the image above I have my Visual Library implementation, wrapped into a MultiViewElement. Story short, there’re 4 SubLayout widgets on the Scene, each SubLayout widget consists of SquareWidgets (squares with a number drawn at its center). Each of these four widgets can be selected through mouse selection on Scene or using the widget explorer (“sample” TopComponent on the bottom right).

I want to make the selection synchronized, either it’s triggered from Scene or from the explorer. A straightforward approach is as follows :

  • When user select a node on the explorer, put the selected SubLayout object into the Lookup of the explorer’s TC.
  • Similarly, when user select a widget on the scene, put the selected SubLayout object into the Lookup of the Scene.
  • Both action above will trigger two LookupListeners, in which the visualization of the selection will be handled. The first listener will invoke the ObjectScene.setFocusedObject, and the other one will call the ExplorerManager.setSelectedNodes

The code went well, until I want to make the selection undoable. The first reference I found was from Geertjan’s blog, as expected.

Quick and dirty, I pass the UndoRedo.Manager of MultiViewElement to the Scene’s constructor to enable the addition of UndoableEdit, which happened in the resultChanged of the first listener mentioned above. Here’s the code

private class UndoableSubLayoutSingleSelectionListener implements LookupListener {

    @Override
    public void resultChanged(LookupEvent ev) {
        if (!allSubLayoutsInLookup.allInstances().isEmpty()) {
            SubLayout c = allSubLayoutsInLookup.allInstances().iterator().next();

            for (Object o : getObjects()) {
                SubLayout localObject = (SubLayout) o;
                if (localObject.equals(c)) {
                    if (!o.equals(getFocusedObject())) {

//add to undo manager before the selection is actually happened
                        SubLayoutSingleSelectionUndoableEdit edit = new SubLayoutSingleSelectionUndoableEdit(o);
                        undomanager.undoableEditHappened(new UndoableEditEvent(o, edit));

//THE selection
                        icForSelectedSubLayoutOnCanvas.set(Collections.singleton(localObject), null);
                        setFocusedObject(o);
                        userSelectionSuggested(Collections.singleton(o), false);
                    }
                }
            }

        }
        validate();
    }

    class SubLayoutSingleSelectionUndoableEdit extends AbstractUndoableEdit {

        private Object previousSelectedObject;
        private Object suggestedSelectedObject;

        private SubLayoutSingleSelectionUndoableEdit(Object o) {
            suggestedSelectedObject = o;
            previousSelectedObject = getFocusedObject();
        }

        @Override
        public String getPresentationName() {
            return "SubLayout Selection";
        }

        @Override
        public boolean canRedo() {
            return true;
        }

        @Override
        public boolean canUndo() {
            return previousSelectedObject != null;
        }

        @Override
        public void redo() throws CannotRedoException {
            super.redo();
            icForSelectedSubLayoutOnCanvas.set(Collections.singleton((SubLayout) suggestedSelectedObject), null);
        }

        @Override
        public void undo() throws CannotUndoException {
            super.undo();
            icForSelectedSubLayoutOnCanvas.set(Collections.singleton((SubLayout) previousSelectedObject), null);
        }

    }

}

The idea is as follows :

  • Before the change of object selection is actually happened, create an UndoableEdit and add it to the manager. This way we have an edit that understands how to redo (the undo part is trivial, isn’t it?)
  • Since the selection might be triggered from the explorer, we set the content of icForSelectedSubLayoutOnCanvas (an InstanceContent) once again to make sure the listener won’t be triggered again if the same object is selected afterward from the Scene.
  • Next, we handle the selection using setFocusedObject and userSelectionSuggested

This way, the undo button will do his job excellently. But once you hit the redo button (when it’s enabled), it will correctly put back the selection to the previous object, and after that, it become disabled. It will always be disabled, no matter how many times the undo action has been triggered prior to the redo action is invoked.

After wasting an hour of imitating the code of UndoRedo.Manager, I found that when I call the redo, an edit is added. That will discard all edits in the stack that added after the just redone edit. This time I realized my fault, since setting the content of InstanceContent will trigger the resultChanged once again, so an edit is added.

I managed to make it work properly using a hackish solution : put a boolean variable that will help the resultChanged to recognize whether the listener was triggered from Undo/Redo or from another source. Here’s the revised code from the listener

private boolean triggeredFromUndoRedo;

public UndoableSubLayoutSingleSelectionListener() {
    triggeredFromUndoRedo = false;
}

public void resultChanged(LookupEvent ev) {
    ...
    if (!o.equals(getFocusedObject())) {
        if (!triggeredFromUndoRedo) {
        //add to undo manager before the selection is actually happened
            SubLayoutSingleSelectionUndoableEdit edit = new SubLayoutSingleSelectionUndoableEdit(o);
            undomanager.undoableEditHappened(new UndoableEditEvent(o, edit));
        } else {
            triggeredFromUndoRedo = false;
        }
        //THE selection
        ...
    }
    ...
}

and the UndoableEdit

public void redo() throws CannotRedoException {
    super.redo();
    triggeredFromUndoRedo = true;
    icForSelectedSubLayoutOnCanvas.set(Collections.singleton((SubLayout) suggestedSelectedObject), null);
}

public void undo() throws CannotUndoException {
    super.undo();
    triggeredFromUndoRedo = true;
    icForSelectedSubLayoutOnCanvas.set(Collections.singleton((SubLayout) previousSelectedObject), null);
}
Posted in fail : reconstructed, netbeans platform, visual library api | Leave a comment

My Widgets are not repainted immediately!

Initialization : I had a complete Scene.addChild(WidgetP) and WidgetP.addChild(WidgetC) structure, and added a defaultMoveAction to WidgetP. I override the isHitAt method of WidgetP such that it will return true if any of its children.isHitAt returns true.

Problem : I tried to drag WidgetP, but it won’t move. Hmm there must be something wrong with my code, so I switch back to Netbeans but it seems that there’s nothing wrong. So I switch back to my app and WidgetC has been moved. Ghost. I move it again, it stands still. I zoom the Scene out, it moves.

I tried to listen the event and put a SceneListener on my TopComponent. Indeed, no event is fired while I drag the widget.

The thing is, if I drag WidgetC far enough to trigger the scrollbar to appear, it is rendered correctly under my cursor.

Culprit : WidgetP extends LayerWidget.

Solution : Changing the declaration of superclass from LayerWidget to Widget solves the problem.

Lesson learned : LayerWidget.isRepaintRequiredForRevalidating always returns false. Next time, I will remind myself not to type extends LayerWidget and use Widget instead.

Posted in fail : reconstructed, netbeans platform, visual library api | Leave a comment

Move Up/Down a Widget in Visual Library API

Let’s say I’m building a Scene and adding some LayerWidgets. Next I want to let user to arrange the order of these LayerWidgets, just like any other Layer-like functionality in Photoshop or CorelDraw. Bring forward, bring backward, bring to front, and bring to back.

Yay bringToFront and bringToBack is already there! Now it’s time to see their code and use our copy-paste-modify wizard. I’ll start from bringToFront to create a bring-forward function that is bringUp.

Applying C.bringToFront to an array of children (last children on the front)

A-B-C-D-E

will result

A-B-D-E-C

On the other hand, I want my C.bringUp to rearrange

A-B-C-D-E

into

A-B-D-C-E

Thanks to private Widget parentWidget AND private List children, I can’t imitate the code of bringToFront to my bringUp function. OK, it’s time to improvise.

Note that the expected result of D.bringUp can be acquired using a chain of D.bringToFront-B.bringToFront-A.bringToFront. So here it is my implementation of bringUp :

//reference to itsParent.children
List<Widget> children = this.getParentWidget().getChildren();
int size = children.size();
int movedIdx = children.indexOf(this);
if (movedIdx == size - 1) {
	//already on top
} else if (2 * (movedIdx + 1) < size) {
	//too far to the start of the list 
	//use bringDown of its next sibling
	children.get(movedIdx + 1).bringToBack();
	if (movedIdx > 1) {
		for (int j = 0; j < movedIdx; j++) {
			children.get(movedIdx).bringToBack();
		}
	}
} else {
	children.get(movedIdx).bringToFront();
	if (movedIdx < size - 2) {
		for (int j = 0; j < size - movedIdx - 2; j++) {
			children.get(movedIdx + 1).bringToFront();
		}
	}
}

This code is tested. We can then implement bringDown method analogously.

Posted in netbeans platform, visual library api | Leave a comment